Designing a Native Plant Garden
When I first joined Green Oasis Community Garden in 2024, I had essentially zero knowledge of gardening. More than that, I didn't really understand what the purpose of a public garden was. Was it supposed to be an artistic expression of the gardeners? Provide beauty for the community? Or perhaps offer a refuge from the concrete jungle? How do we choose what sort of plants to plant?
Over the last two years, through a great deal of reading, conversation, and visits to other gardens, the concepts of "community" and "garden" started to merge. A "community" began to include not just the human garden members, but also the plants, insects, birds, other wildlife, and even the microbes in the soil. At the same time, the "garden" began to include the human gardeners themselves, not as external imposers of will, but as just another part of the ecosystem. The focus was no longer only on which plants and animals and humans are in the garden, but on how they relate to each other spatially, temporally, ecologically, and communally.
In order to provide food and shelter for wildlife, as well as beauty and education for humans, we decided to create a new native plant garden at Green Oasis. Native plants are those plants that are indigenous to the area, which have co-evolved with the local fauna for millions of years.
Learning
Reading
The first step was to read and learn as much as we could. As amateurs, we had little to no formal training or even practical experience. The following resources were tremendously helpful. Bringing Nature Home explained that the best way to support our local ecosystems is through planting native plants. Planting in a Post-Wild World explained how to combine those native plants into a designed plant community that would be beautiful, resilient, low-maintenance, and full of life.
- Bringing Nature Home by Douglas Tallamy
- Planting in a Post-Wild World by Thomas Rainer and Claudia West
- Xerces Society resources
- New York City Native Planting Guide, 4th edition
- reddit.com/r/nativeplantgardening
- GrowitBuildit (website and YouTube)
- Native Landscape Design and Implementation video
- The Bees in Your Backyard by Joseph S. Wilson and Olivia Messinger Carril
Observing
Before planting anything, we spent a long time just observing the garden as it is. How does it look in each season? What areas get lots of sun and which are shaded throughout the year? Where does water collect during a heavy rainstorm? What areas are most visited by humans? We tried to identify as many plants, bushes, trees, insects, and birds as possible (iNaturalist, Plant.net, and Merlin smartphone apps help, in addition to standard dichotomous keys). We shared our knowledge and observations with each other, as well as the history of the plants in the garden over the decades. We took hundreds of pictures of the garden as a whole as well as of individual flowers, birds, and insects.
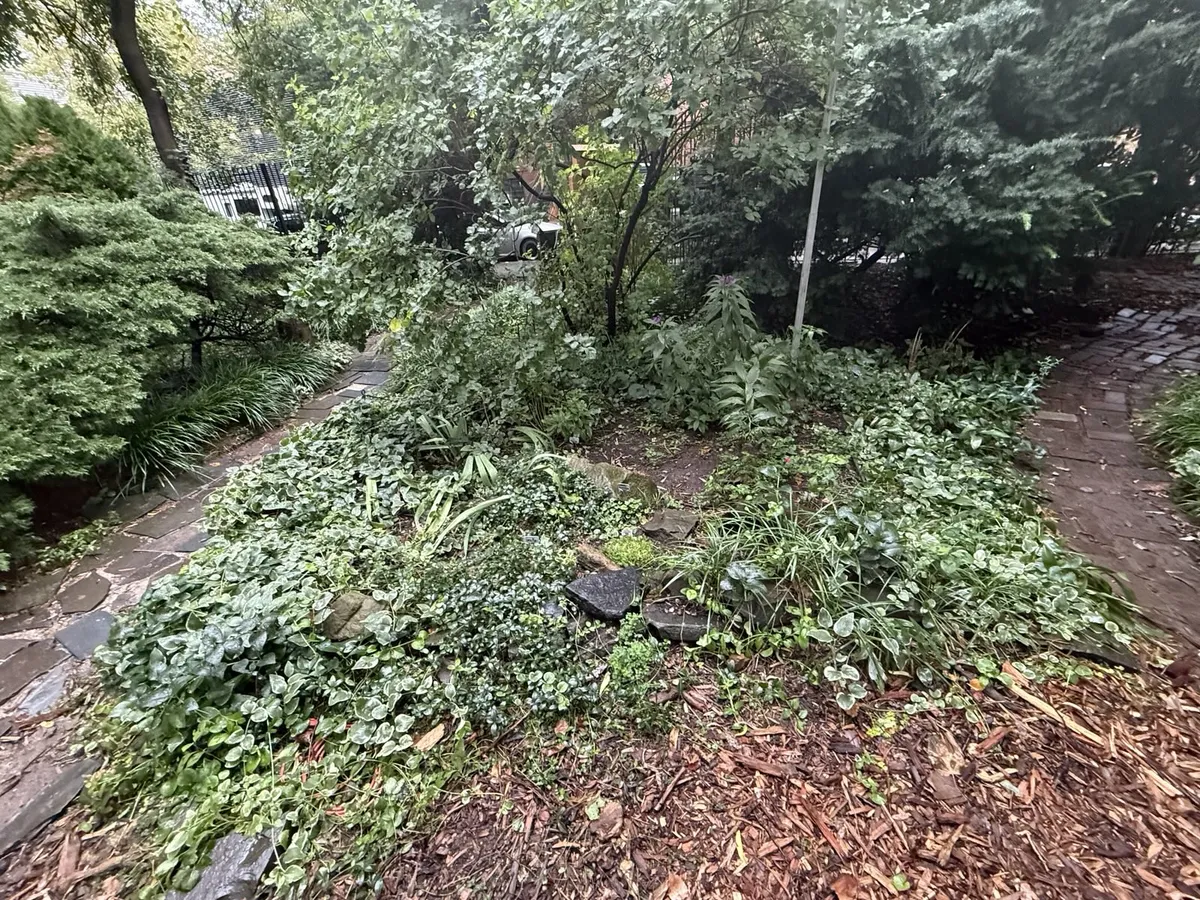
We discovered that the garden struggled with invasive species such as multiflora rose, porcelainberry, white mulberry, goutweed, and vinca. Different invasive species require different methods of control. For tree saplings or bushes, we decided to remove them immediately if possible. But for groundcover vines such as goutweed and vinca, we realized it was best to plant something in their stead rather than simply removing them.
As a woodland garden, we were quite shady throughout the year as soon as trees leafed out in spring. There were essentially no areas of full sun conditions (over 6 hours of direct sunlight per day).
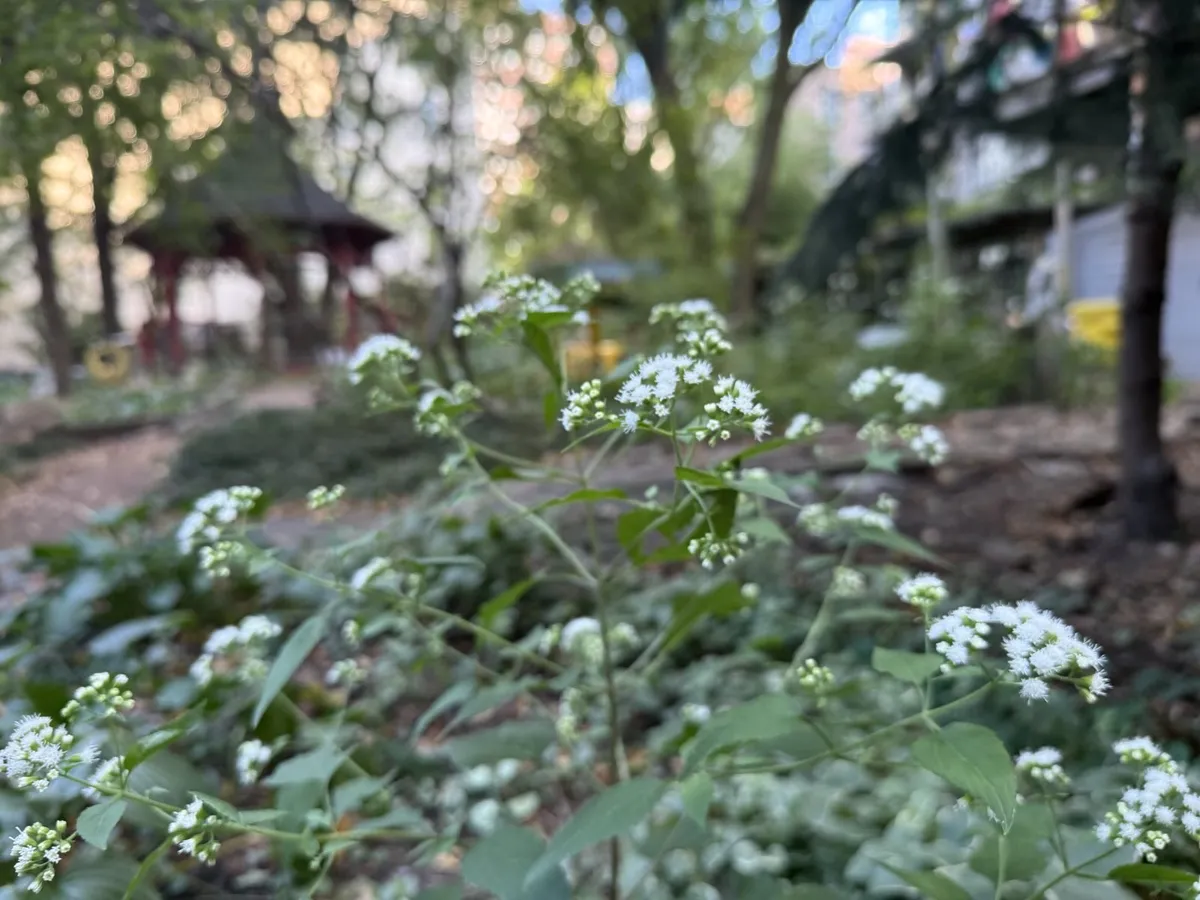
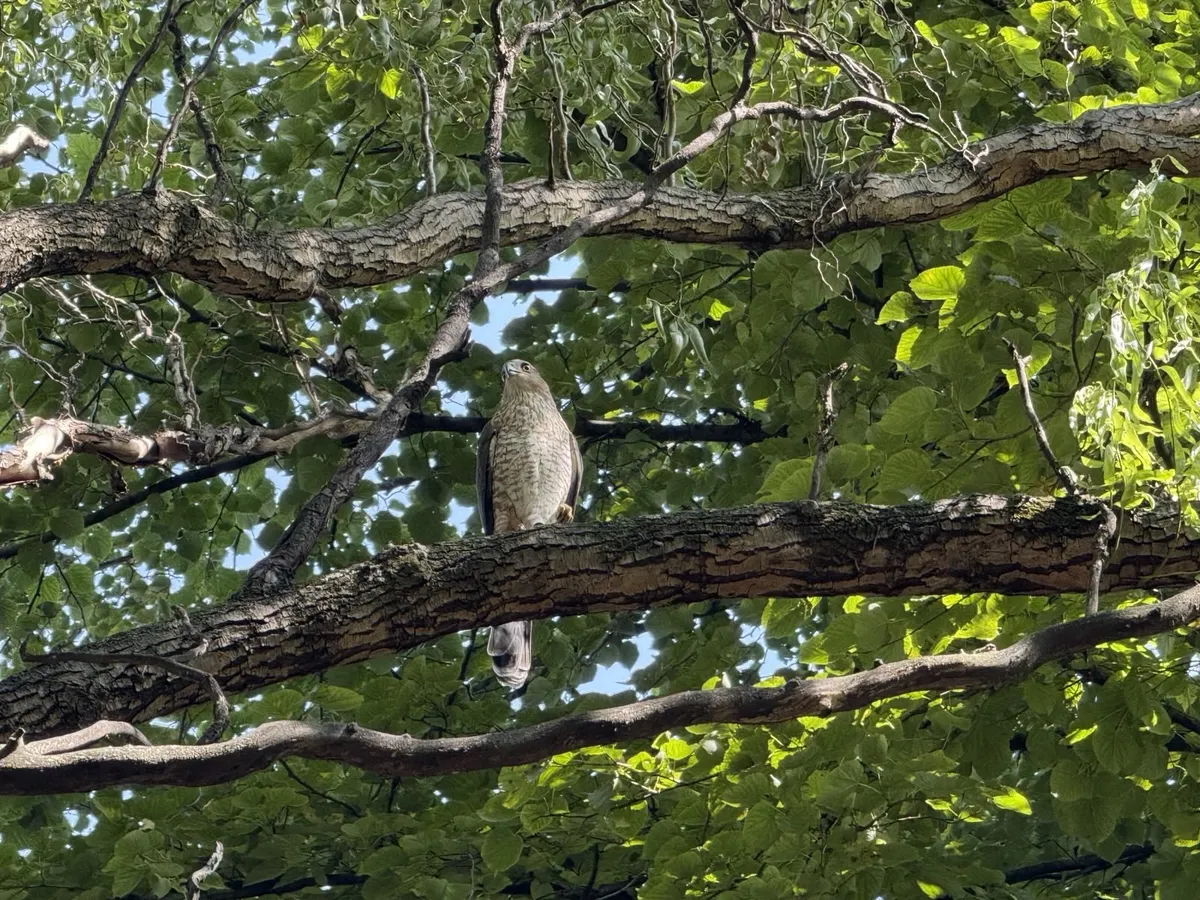
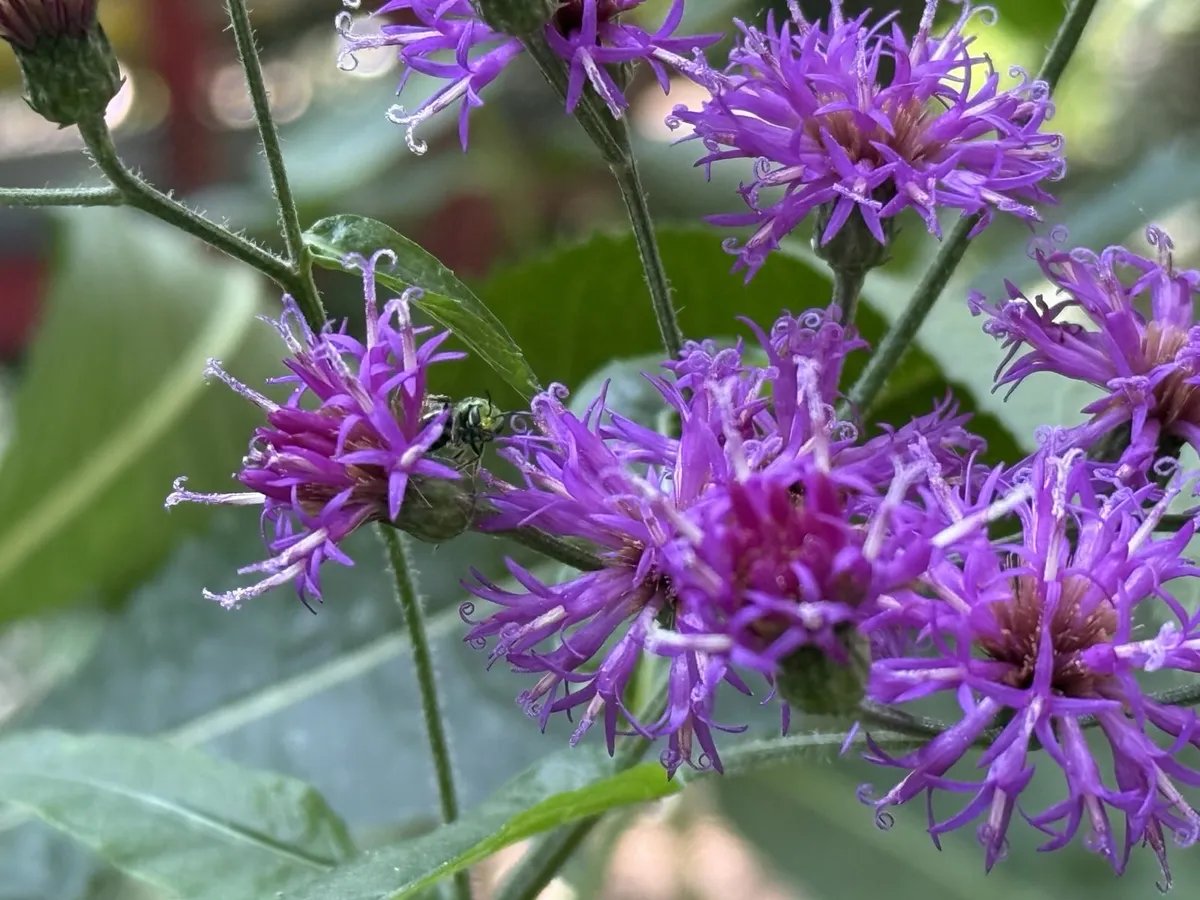
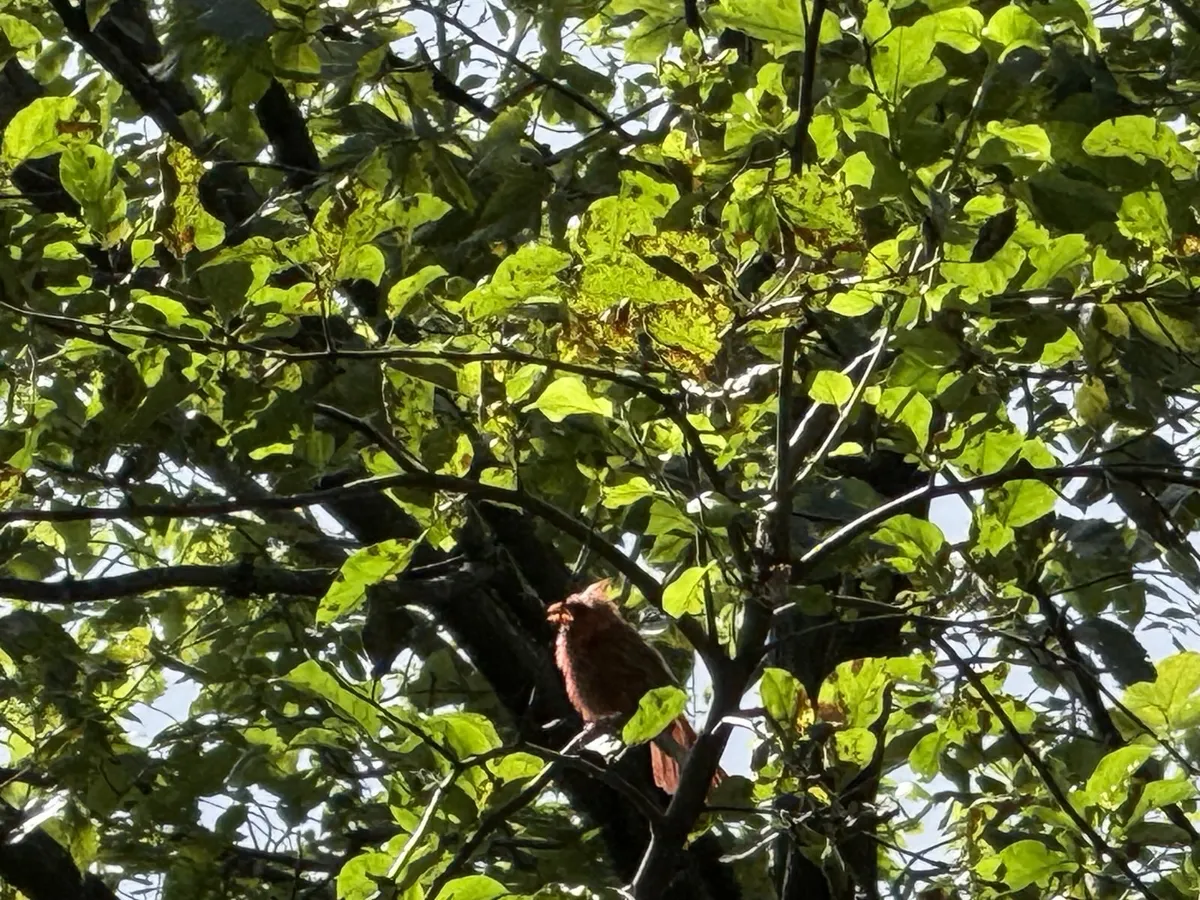
Yet we also found many native plants that did quite well, such as white snakeroot (late-blooming woodland wildflower), Virginia bluebells (spring ephemeral), swamp milkweed, and lady fern. Looking at the site conditions for the plants that already do well was useful during plant selection where we looked for plants that grow in similar circumstances. Moreover, we already had a rich population of wildlife: leaf-cutter bees, green sweat bees, bumblebees, carpenter bees, yellowjackets, fireflies, house flies, monarch butterflies, mosquitos, squirrels, rats, robins, bluejays, cardinals, migrating warblers and sparrows, and the occasional Cooper's Hawk.
In addition, we visited several other native plant gardens in the area for inspiration and research, including the High Line, the southeast corner of Tompkins Square Park, Brooklyn Botanic Garden, New York Botanical Garden, Kingsland Wildflowers, and Seward Park, often several times throughout the year.
Designed plant communities
Planting in a Post-Wild World discusses the concept of designed plant communities. Plant communities are a way of thinking about a group of plants in a particular place, so we can observe how they interact with each other and with the environment. Like any other type of community, plant communities change over time through processes of ecological succession or disruptions caused by floods, wildfires, or humans. A designed plant community is a plant community that is intentionally created by a garden designer.
As humans, we have certain design goals, such as wanting to maintain visual legibility throughout the year. At the same time, the idea of a designed plant community acknowledges that the planting will evolve throughout the years in ways we may not have predicted. Plants will move around, some may die out, and others may be introduced spontaneously. Our goal is to achieve our design goals but without insisting that the planting remain in stasis indefinitely; we must accept, and celebrate, that the plant community will change. Indeed, while we will make great efforts to select plants that are adapted to the particular site conditions, we can never be perfect. Allowing plant communities to evolve by themselves leads to a resilient garden.
Of course, resilient and aesthetic plant communities already exist. We need only look at our beautiful meadows, shrublands, and forests. These ecosystems have developed over millions of years under intense competition and environmental stressors. In order to create designed plant communities, we first take inspiration from nature. Planting in a Post-Wild World offers five principles of designed plant communities:
- Relations, not individuals. Thinking about how plants interact and compete with each other is instrumental. For example, while perennials are long-lived but slow-growing, annuals are short-lived but fast-growing. Having a few annuals helps automatically fill in empty spaces when perennials eventually die, before invasive species have the chance to take root.
- Choose plants based on the existing site conditions, rather than trying to alter site conditions (such as light exposure, moisture levels, or soil texture) to fit the plants we desire. Changing the environment is usually extremely costly and laborious while not being particularly effective in the long-term.
- Plant a dense groundcover layer composed of several species (sometimes called a "green mulch"). Groundcover plants enhance the strength of the planting by suppressing invasive species and retaining soil moisture, which allows us to minimize weeding (which damages the soil structure) and watering (which is time-consuming and costly). Groundcovers do not "take resources" from taller plants because their root systems and leaf morphologies have evolved to complement, rather than compete, with each other.
- Design for legibility. For most gardens (especially public-facing ones like a community garden), it is important to convey a sense of intentionality and care. Neat borders and frames work well, in addition to signage explaining the intent behind the planting. If plants grow into pathways, they can be cut back. Plants may need a yearly cutback to maintain legibility (even if this is not ecologically "optimal").
- Focus on management, not maintenance. A designed plant community tries to minimize routine (often costly and laborious) maintenance tasks such as watering, mulching, spraying and pruning. Instead, we focus on more infrequent, bigger-picture goal-driven management, such as a yearly cut-back, selective additions, or selective removals. This allows us to preserve our design goals while also allowing the planting to evolve by itself.
The authors describe a four-layer framework to creating designed plant communities.
- Layer 1: Structural plants are long-lived and offer year-long legibility and clarity (10-15% of the plants)
- Layer 2: Seasonal theme plants are selected to bloom continuously throughout the year, offering pollen and nectar for pollinators and beauty for humans (25-40% of plants)
- Layer 3: Groundcover plants are low-growing, competitive, clonal-spreading and provide soil fertility, soil structure, erosion control, moisture retention, stormwater capture, invasive species suppression, phyto-remediation, and wildlife habitat (50% of plants)
- Layer 4: Dynamic filler plants are short-lived but fast-growing and readily self-seeding, filling in gaps left by disturbances or plant deaths before invasives take over (5-10% of plants)
This framework was quite helpful in simplifying an initially daunting task. It is generic, usable in meadow, shrubland, and woodland settings, and is not specific to any one region. Our job is to understand the characteristics of the available plants and assess them for site suitability and arrange them into the four layers. But first, an aside about what it means to garden at a community garden.
Community gardens
The nature of community gardens
Community gardens in New York operate in a very different way compared to public parks and private homes. Although the land is generally owned by either the city parks department or a community land trust, the garden is managed and maintained entirely by volunteers (the garden members).
Unlike a city-managed park, we are not mandated to design for public concerns. We are free to design a garden that may be deemed too "untidy" for a park, and we don't have to design for clear sightlines. On the other hand, often the pathways in community gardens are not accessible to wheelchair users or the elderly, and elements like ponds may not have adequate safety features to protect unattended children.
In the end, it is up to the garden members to create a design that preserves a unique style and artistry, while maintaining legibility and usability for the community we serve. We must do this as amateurs with little professional expertise, and very limited budget and labor resources. Community garden activity fluctuates throughout the years and turnover can be high; there are times when it's just one or two gardeners maintaining the entire garden. We try to plan for these lulls by creating designs that minimize the need for watering, weeding, and other maintenance.
In a community garden, vision is not directed from above, but instead created jointly and over time. Without a single designer, gardens often lack a unified and straightforward aesthetic that is preserved throughout the decades. Nevertheless, unity of composition is achieved exactly through the cooperative nature of such communities. Each new gardener brings with them their own unique experiences and style but is always working in conversation with the hundreds of gardeners before them. Consider a wildflower meadow which has developed through individual plant species competing and co-evolving. The meadow might later undergo succession, in which it slowly becomes a deciduous forest—again, without a single designer leading the effort. Out of individuals and relations emerges community.
Sometimes, gardeners disagree about what a community garden should mean. Is the "community" that the garden serves the members of the garden, the surrounding block, all New Yorkers, or anyone who happens to be passing by? Should the garden move towards a style that is formal and manicured, or wild and "overgrown"? Should we focus on food production, ornamental flowers, or wildlife habitat? These concerns are often directly conflicting.
Part of being a community gardener is learning to embrace transience and multiplicity. We effect change regarding what matters to us, and we try to convince other garden members of the same. But eventually there will be new community gardeners with new concerns. Our role is to develop a garden that can evolve and adapt over time in ways we cannot predict.
Our garden
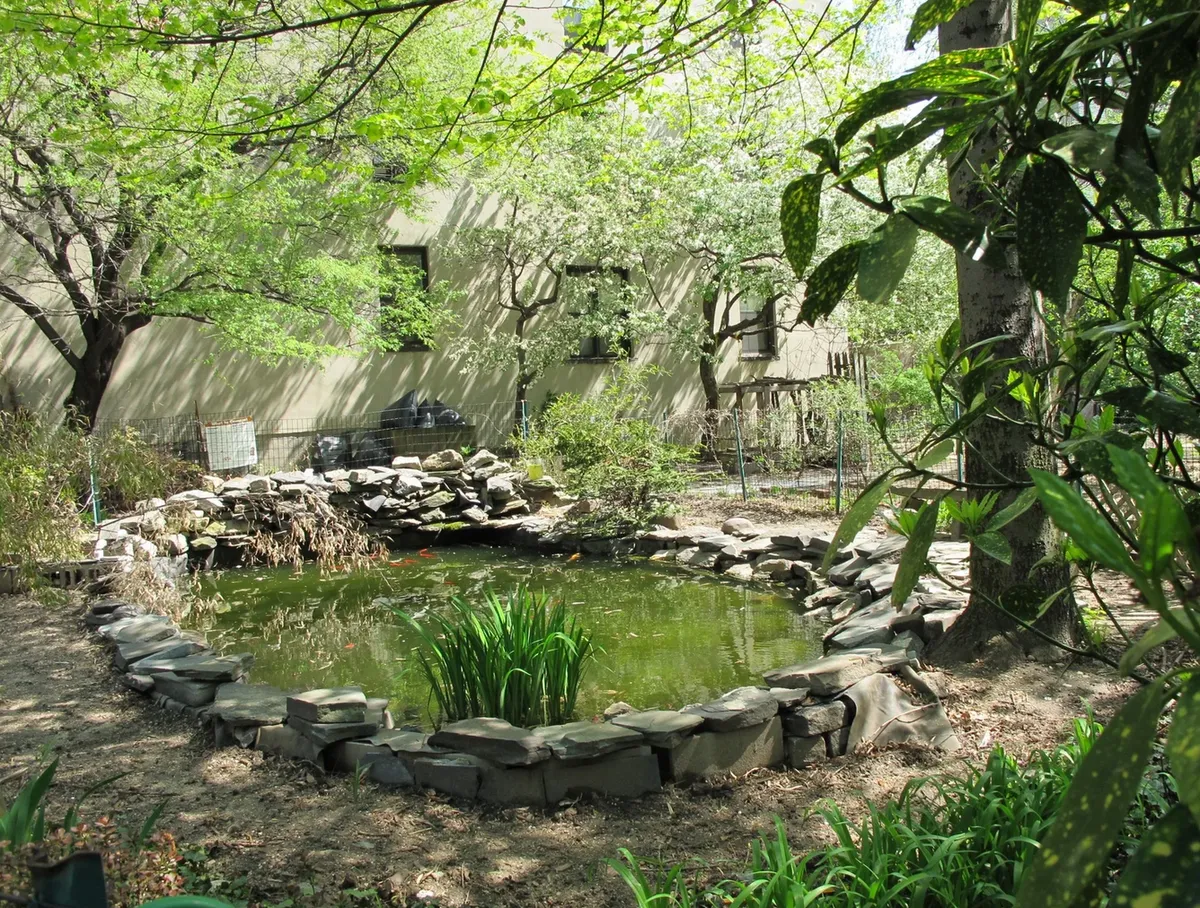
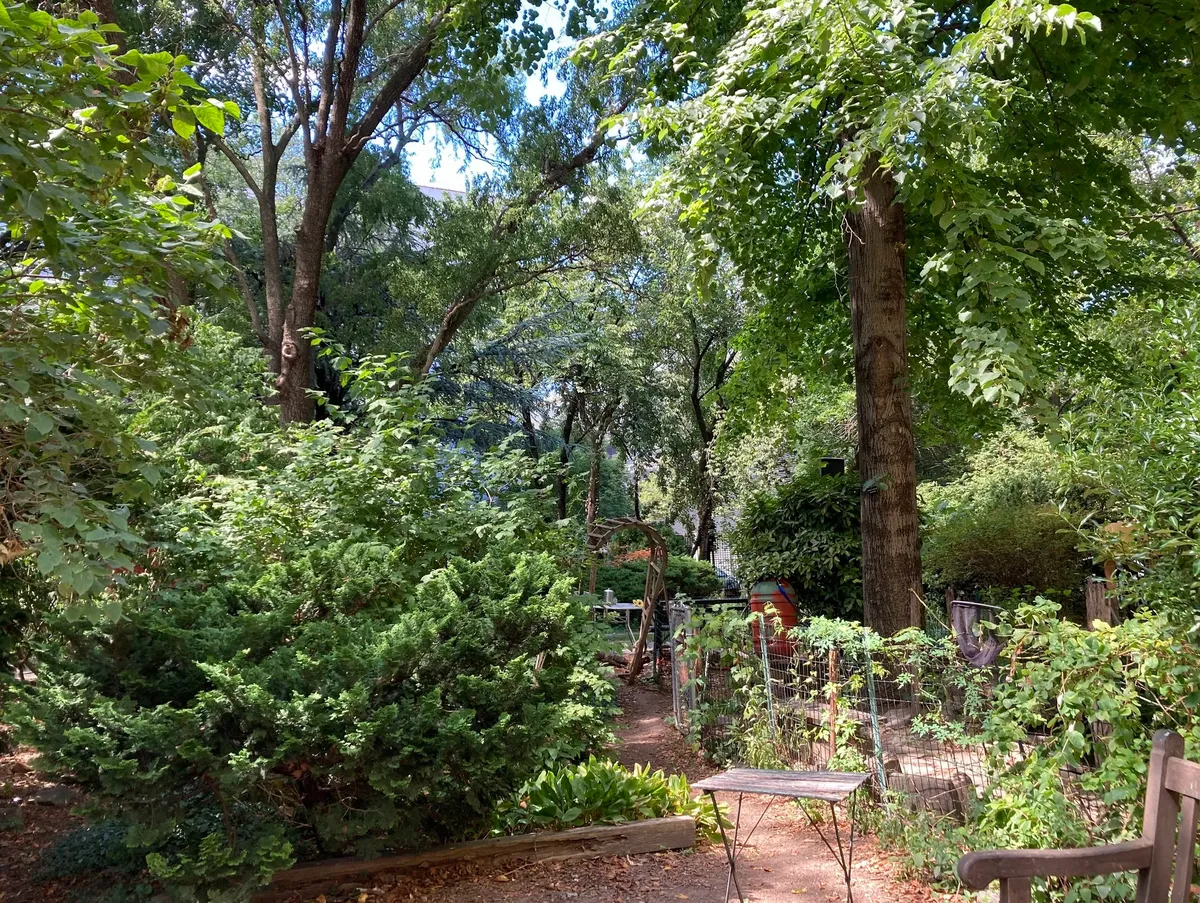
Green Oasis Community Garden is rather large, as far as New York community gardens go. It is an almost half-acre woodland garden, featuring a covered gazebo, stage, pond, meeting tables and a stone grill. We raise money through membership fees ($25/year), donations from the public, donations from event organizers, and grants. The garden is organized into committees such as the gardening committee, events committee, composting committee, and social media committee. Each committee can present a budget request, which is voted on by the entire garden.
Because of the size of our garden, it was okay for us to have a 50 square foot section to run this experiment (although a native plant garden could be as small as 10 square feet). But larger scale changes require buy-in from the garden members voting democratically. Unlike a public park, there is no president or board of directors, and so we must often respond to a multitude of conflicting opinions. A successful small-scale experiment allows us to gain experience and understand the particularities of our own garden, and lets the other garden members slowly get used to new ideas before we can expand our project.
At the beginning of the 2025 garden season, the gardening committee was given a $800 budget for the year. We decided to allocate $500 towards a native plant garden. However, this decision only came about after much reading, education, knowledge-sharing, debate, and compromise. To many, native plants carry a connotation of being "weedy." Further, commercial nurseries and the garden industry heavily market exotic ornamentals such that most people are unfamiliar with the very plants that are native to our own soil.
But we have discovered that genuine excitement is contagious. And when people see a drift of goldenrods ablaze with bumblebees and butterflies, they start to appreciate the kind of garden that is full of life—indeed, the very life that sustains us humans. In New York, ecological garden design has become more popular in the recent years. Public parks such as the High Line, Stuyvesant Cove, Seward Park, and Tompkins Square Park are all embracing native plant gardens for their beauty, ecology, and maintainability. And because of their intentional designs and educational outreach, the public is getting on board as well. We are optimistic that in the near future, the native plants indigenous to our land will no longer seem foreign to us.
Planning and planting
Site selection
The best time of year to plant native perennials is in the fall (approximately between September 1 and October 15 in New York City, depending on the weather that year). This allows us to minimize watering and gives the plants the winter to settle in before they start growing next spring.
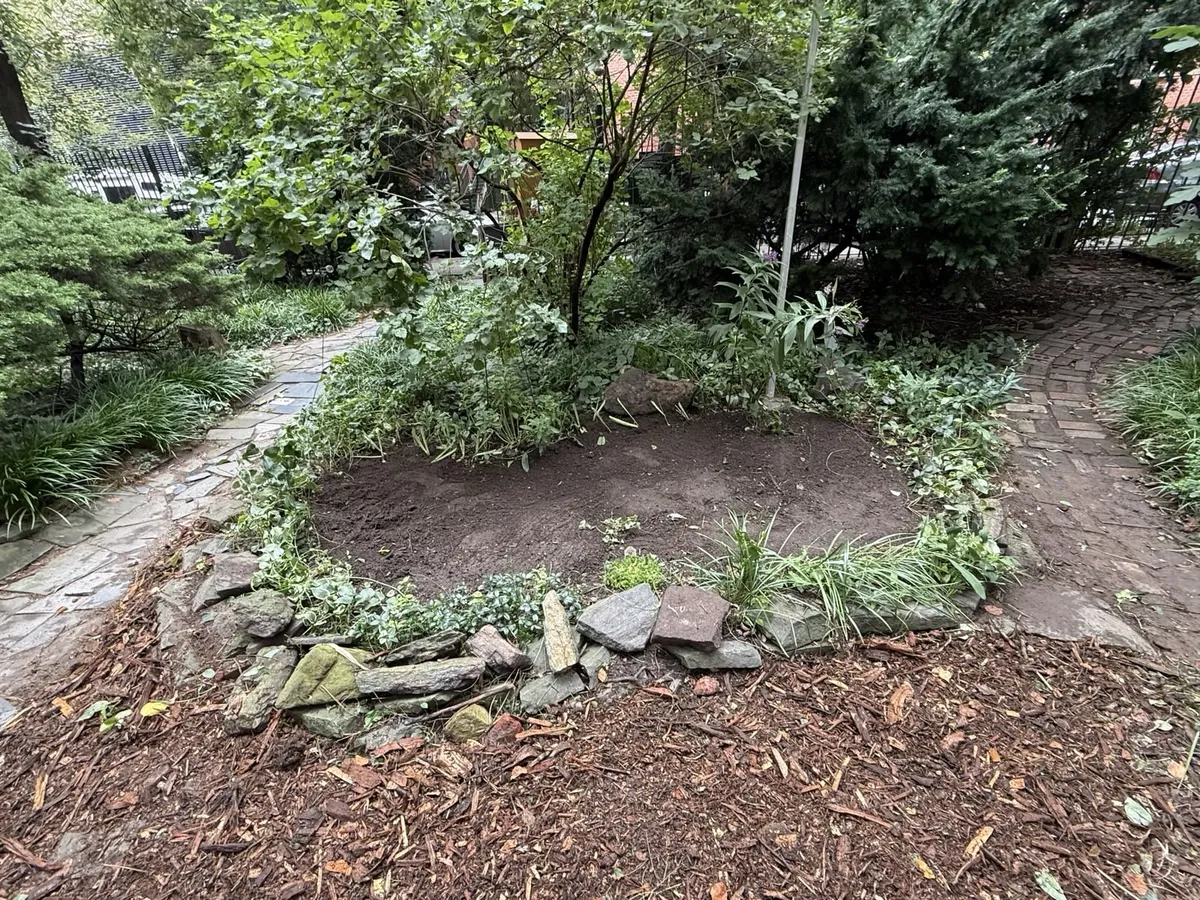
For the site, we chose a partial-sun area in the front of the garden with high visibility. The hope is that it will encourage visitors to learn more about the native plants and how they support wildlife in our garden. Another factor was that this area was initially covered almost entirely in vinca major and vinca minor: we could simply remove everything that was currently there. With rhizomatous invasive species such as vinca, it is very difficult to remove all parts of the rhizome, and even moreso if we have to work around plants we do want to keep (which often hide vinca rhizome fragments in their roots).
Soil testing
We obtained a soil test from Brooklyn College's Urban Soils Lab, which is always a good idea especially in the disturbed urban sites most community gardens are on. You can also do an at-home soil texture test using a mason jar and detergent powder.
For a community garden, our soil is pretty decent, with a high percentage (8%) of organic matter and a sandy loam texture. It is a bit alkaline, probably because there used to be a building on the land, but likely not enough to affect plants other than acid-loving blueberries and the like. The soil is also somewhat low in nitrogen/phosphorus/potassium, but native plants in New York actually prefer relatively nutrient-poor soils (indeed, excessive nitrogen can prove detrimental by promoting invasive growth and foliage overgrowth). Salinity levels were not concerning either.
Because we are growing native plants, we did not find it necessary to amend the soil. We will likely limit future soil treatments to occasionally top-dressing with compost produced by the garden's composting committee, and of course, leaving the leaves. In fact, the high quality of our soil is likely because we have left the leaves every winter for decades.
Plant selection
There is unfortunately a dearth of native plant nurseries in New York. The main one is Lowlands Nursery in Gowanus, operated by the Gowanus Canal Conservancy as a non-profit.
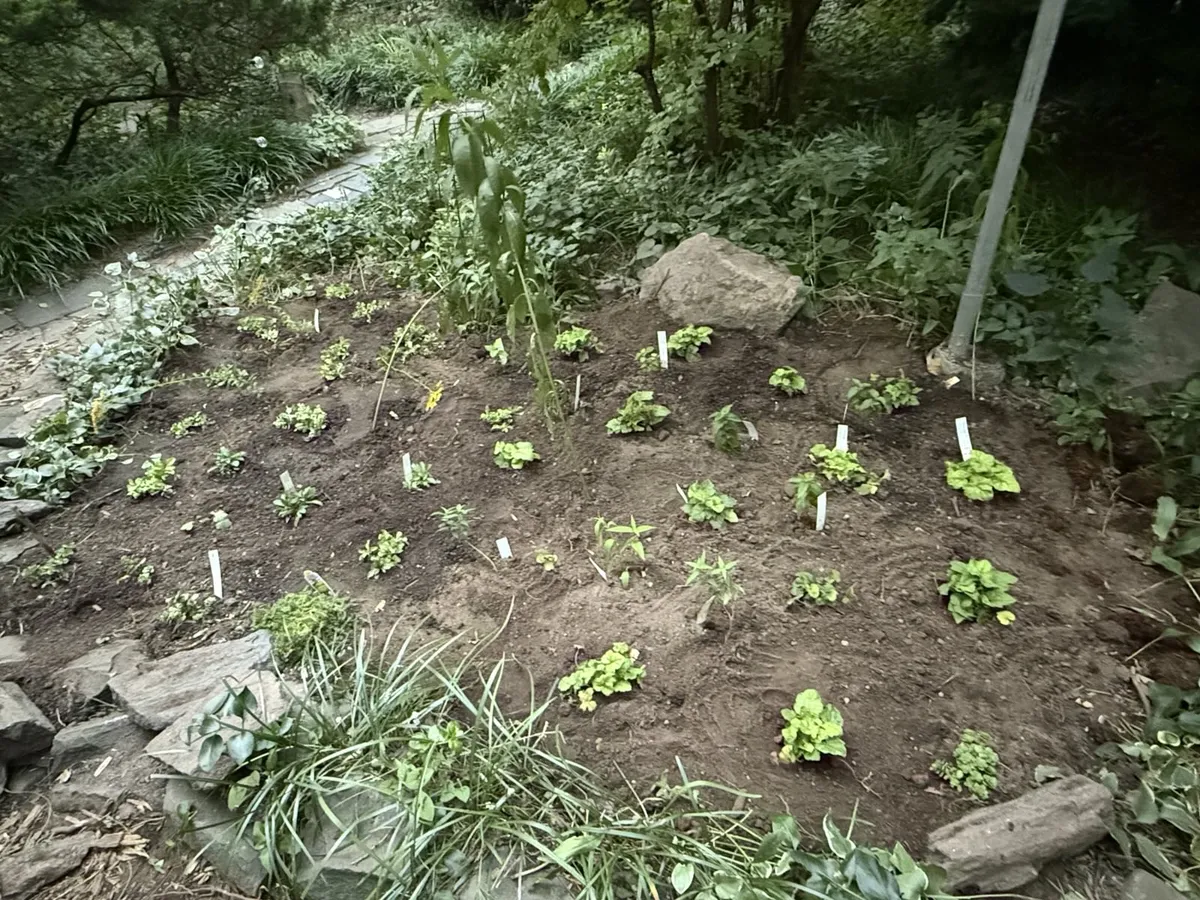
We estimated that our $500 budget would purchase around 50 plants from Lowlands Nursery. Spacing between plants varies greatly depending on whether one is looking at a vegetable garden, agricultural farm, ornamental flowerbed, or the wild. We've followed Planting in a Post-Wild World's advice by planting densely and underplanting groundcover. For most plants, their size at maturity is about one square foot (one can research spacing for each plant online); so we opted for a one foot spacing throughout the planting in order to minimize bare soil. This means that we could plant an area of approximately 50 square feet.
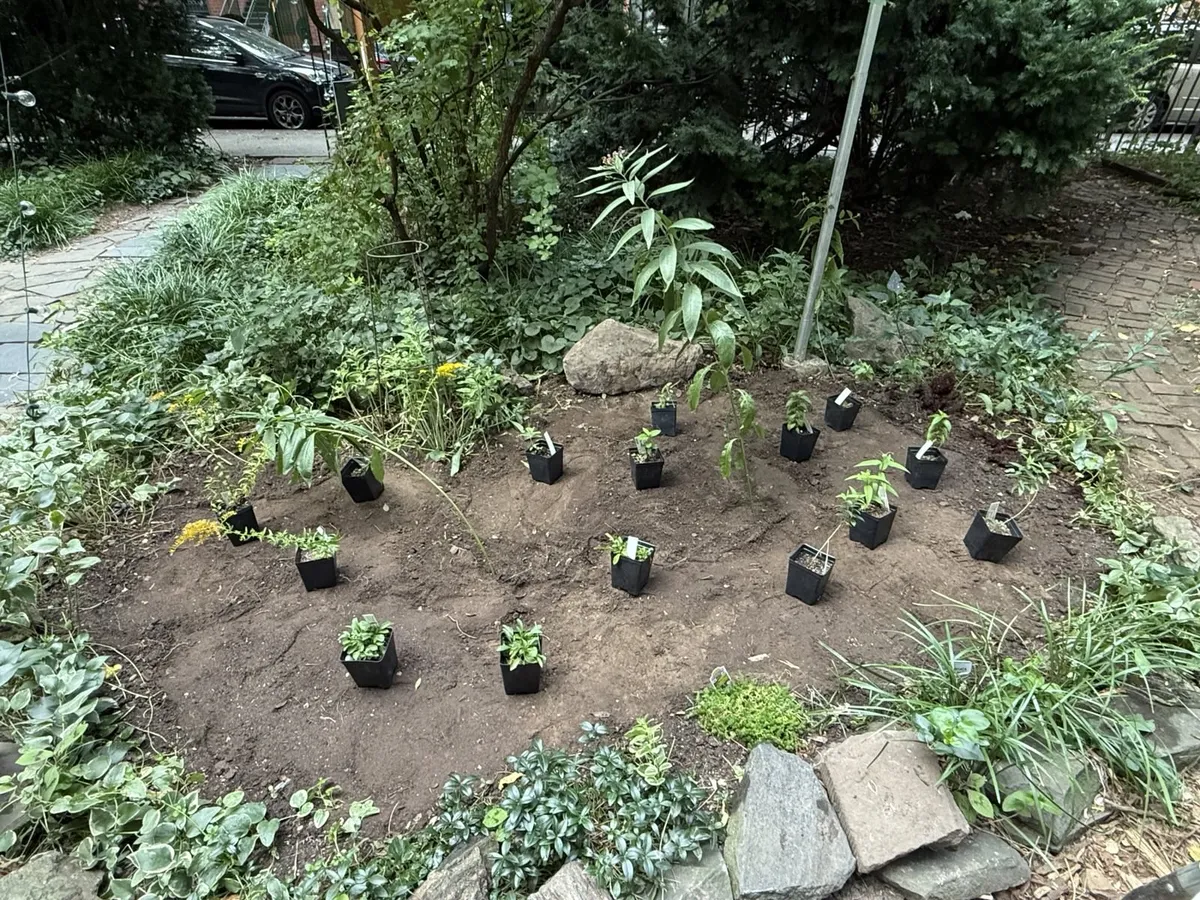
Using the four-layer framework above, we decided to plant 2 structural plants, 30 groundcover plants, 15 seasonal theme plants, and 5 dynamic filler plants. In addition, because we are a woodland garden, we additionally interspersed 15 spring ephemerals (described below), for a total of 65 plants.
Lowlands Nursery allows us to filter by various site conditions but we found that all nursery websites are inconsistent with regards to light exposure, moisture needs, and bloom times, which are more complicated than a discrete categorization. It's best to just research every single plant offered by the nursery, cross-referencing multiple sources. It took a lot of time but was worth it in the end.
For the structural layer, we decided to transplant 2 New York ironweeds that were already in the garden. Ironweed has a remarkable structure even when it is not blooming, reaching 6-8 feet tall with a strong silhouette created by clearly defined leaves and seedheads. In the future, we could have used a few more ironweeds to reinforce that structure.
For the seasonal theme layer, our candidate plants were hairy beardtongue, monarda fistulosa, hoary skullcap, woodland sunflower, sweet goldenrod, hoary mountainmint, monarda didyma, and calico aster. We looked at the bloom calendar for each and decided on three each of the first five plants, which would provide a continuous bloom throughout the year. Having at least three of each plant is important so pollinators don't have to wander too far to get a full meal.
For the groundcover layer, our candidate plants were foam flower, creeping phlox, three-leaf stonecrop, Pennsylvania sedge, and rosy sedge. For this planting, the garden committee decided not to use any sedges, so we decided on 13 foam flower, 13 creeping phlox, and 4 three-leaf stonecrop. In future projects, it would be better for us to use a greater biodiversity in this layer. Sedges, ferns, and plants like heuchera, geranium and large-leafed aster are also good groundcover plants for shady areas.
Finally, for the dynamic filler layer, we chose wild columbine.
For woodland ecosystems, there's actually an additional secret spring ephemeral layer. Spring ephemerals are plants that bloom before forest trees leaf out in early spring and then completely die back in just a few weeks. They're critical food sources for pollinators awakening from hibernation and unfortunately in decline due to invasive species such as Japanese barberry. Because these spring ephemerals die back so quickly, they don't really compete with the other plants, allowing us to interplant them without worrying too much about overcrowding the area: another opportunity to add even more biodiversity. We found it very difficult to find spring ephemerals for sale in New York City, and ended up purchasing them online from Plant Buying Collective. Let us know if you know of a local dealer! Our choices were three each of bloodroot, spring beauty, mayapple, dutchman's breeches, and trout lily.
Plant layout
For this step, we researched the height of each plant in order to make sure the taller plants don't shade out the shorter ones. Observe the path of the sun throughout the year; generally, taller plants will shade out plants north of them (though this may not be a problem if those are shade tolerant).
The following graphic was made in Inkscape. We've since printed it out and posted it on a signboard near the planting for curious visitors.
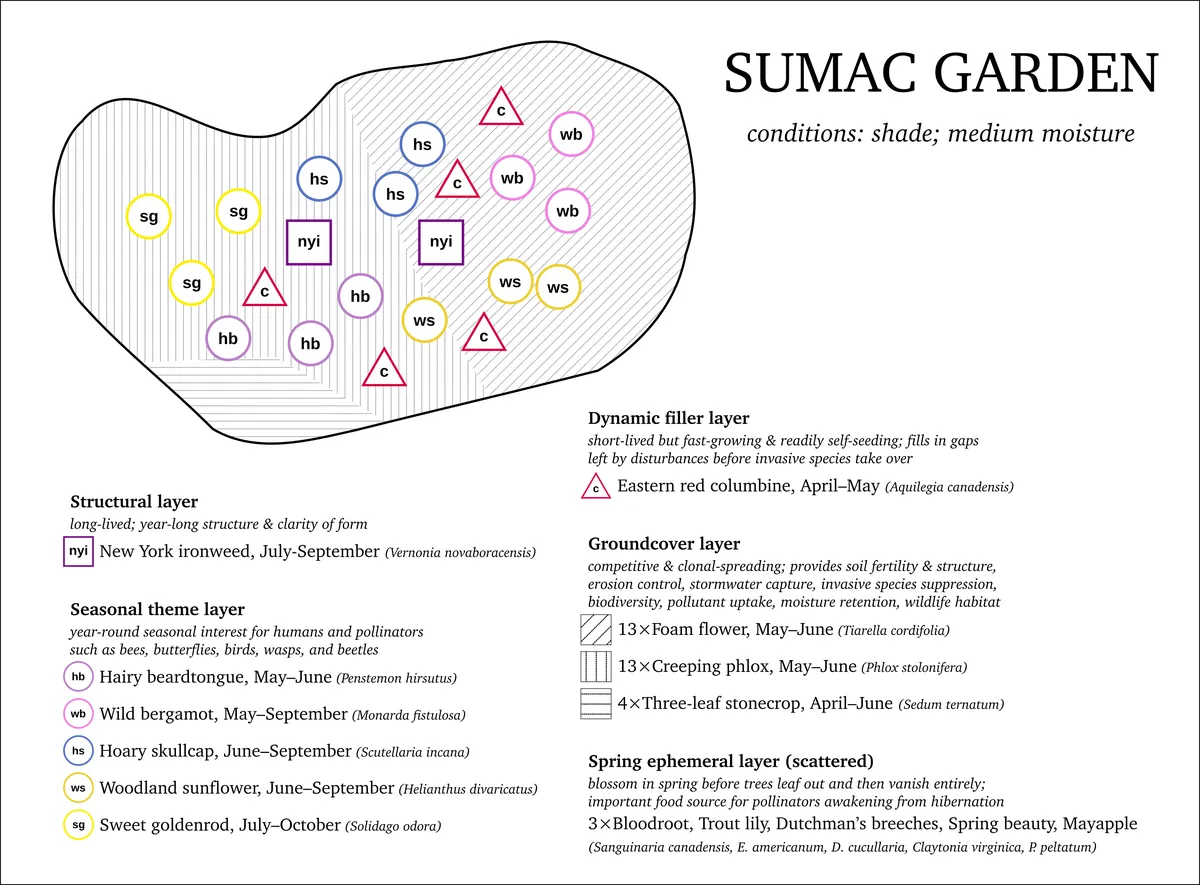
The placement of structural plants is the most important. Next time, a central cluster of 3-5 New York ironweeds might be better. The exact placement of the structural plants doesn't matter as much, but we try to create horizontal-ish "drifts" of 3-5 plants. The dynamic filler layer is scattered so the soil's seed bank evenly fills up with columbine seeds. Finally, groundcover plants are placed to fill in all the gaps; their exact location is determined on planting day. Spring ephemerals can then be interplanted; they don't need much room.
Site preparation
The area was initially covered almost entirely in non-native vinca and liriope, which are both notoriously difficult to remove. Because vinca is rhizomatous, methods like sheet mulching are not effective. Due to the small scale of the planting, we decided on mechanical removal, and we went out during a rainstorm and weeded the area for 4-5 hours. The rain makes it much easier to ensure we remove all the parts of the plant, as vinca can grow back from just a few inches of remaining rhizome. However, rain also increases the danger of human-induced soil compaction, so we had to be careful to minimize how much we stepped into the bed. Three indispensable tools were a mattock (my love), hori hori knife, a CobraHead weeder, and a garden kneeler. We continued to do a few passes for the next week to catch any remaining roots.
One method of mechanical site preparation is to leave the bed alone at least for a few weeks and up to several months to see what grows back to continue weeding. However, because we are a public-facing community garden and this area was front-and-center, this was infeasible: we needed to minimize the time the site was bare soil. This is another reason why methods like sheet mulching or solarization are difficult in practice at community gardens. In general, the Xerces Site Preparation guide is invaluable for evaluating site preparation methods.
A further downside to mechanical removal to this extent is the damage to soil structure by essentially tilling the first few inches of soil. This also brings up dormant weed seeds to the surface, which could overwhelm the planting next spring if we are not diligent about weeding regularly. But in this case, we found no other alternative.
Luckily, the soil was not particularly compacted, which can be an issue especially on urban sites. If it was, we would've used a core aerator to aerate the soil (as opposed to more destructive and less effective methods such as tilling).
Buying the plants
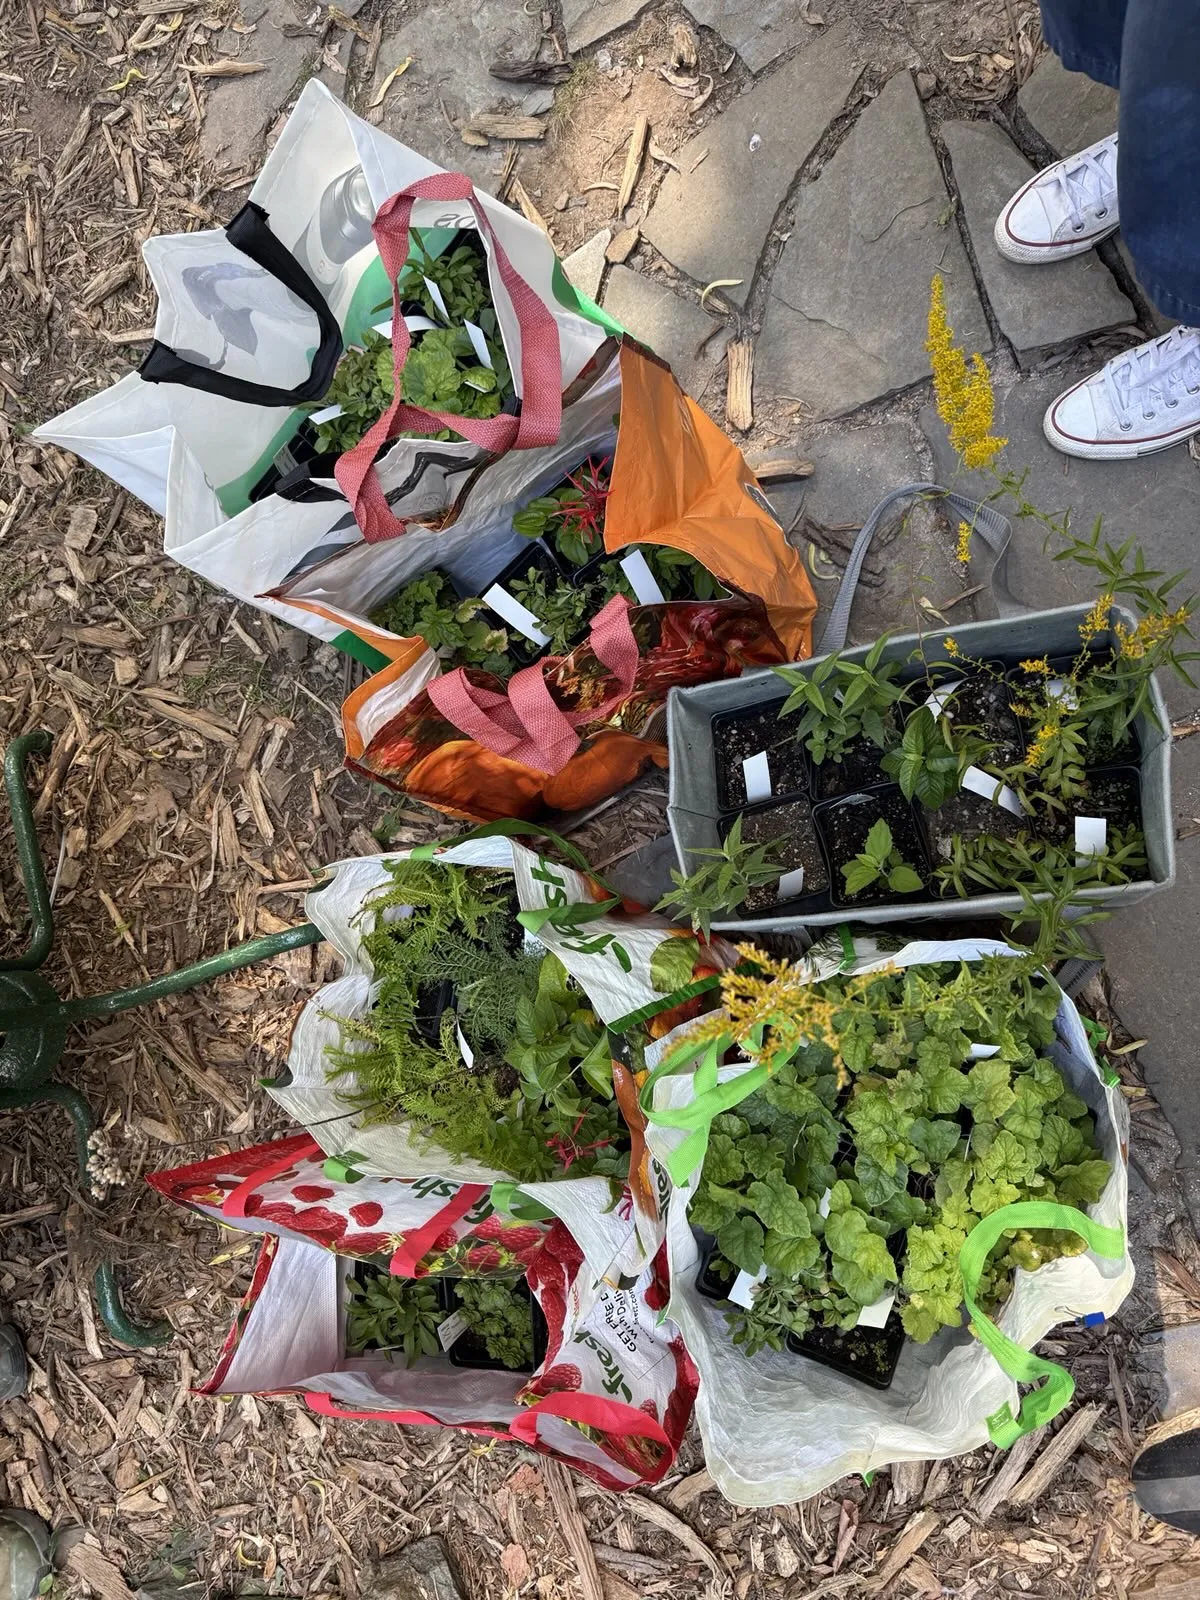
As mentioned, we sourced most of the plants from Lowlands Nursery in Gowanus. We e-mailed the nursery to get our 25% discount as a community garden and sales tax exemption as a registered 501(c)(3) organization. A few of us took shopping bags and made the journey on the F train. It was convenient to go by subway (a taxi would be very expensive), but requires bringing several people: plants can't really be stacked, so there's a limit on how much one person can carry.
For our next planting, we will consider the city-run PECAN nursery (formerly the Greenbelt Center). They only work with government entities (including community gardens), but are almost four times cheaper than Lowlands, offer a wide selection, and collect much of their seed themselves from local wilderness, ensuring biodiversity and a local ecotype. The downside is that it is incredibly inconvenient to get to their Staten Island nursery, and they don't offer delivery service. If we order from PECAN, we'll likely ask a fellow gardener with a car to help with transportation (or just rent a car).
We purchased columbine online from Prairie Moon Nursery and the spring ephemeral plants online from Plant Buying Collective, though they haven't arrived yet.
Site installation
Installation is also done in layers. First the structural plants, then seasonal theme plants, dynamic filler plants, and finally groundcover plants to fill in all gaps. Our spring ephemeral plants haven't arrived yet, but when they do we will intersperse them between the groundcover plants.
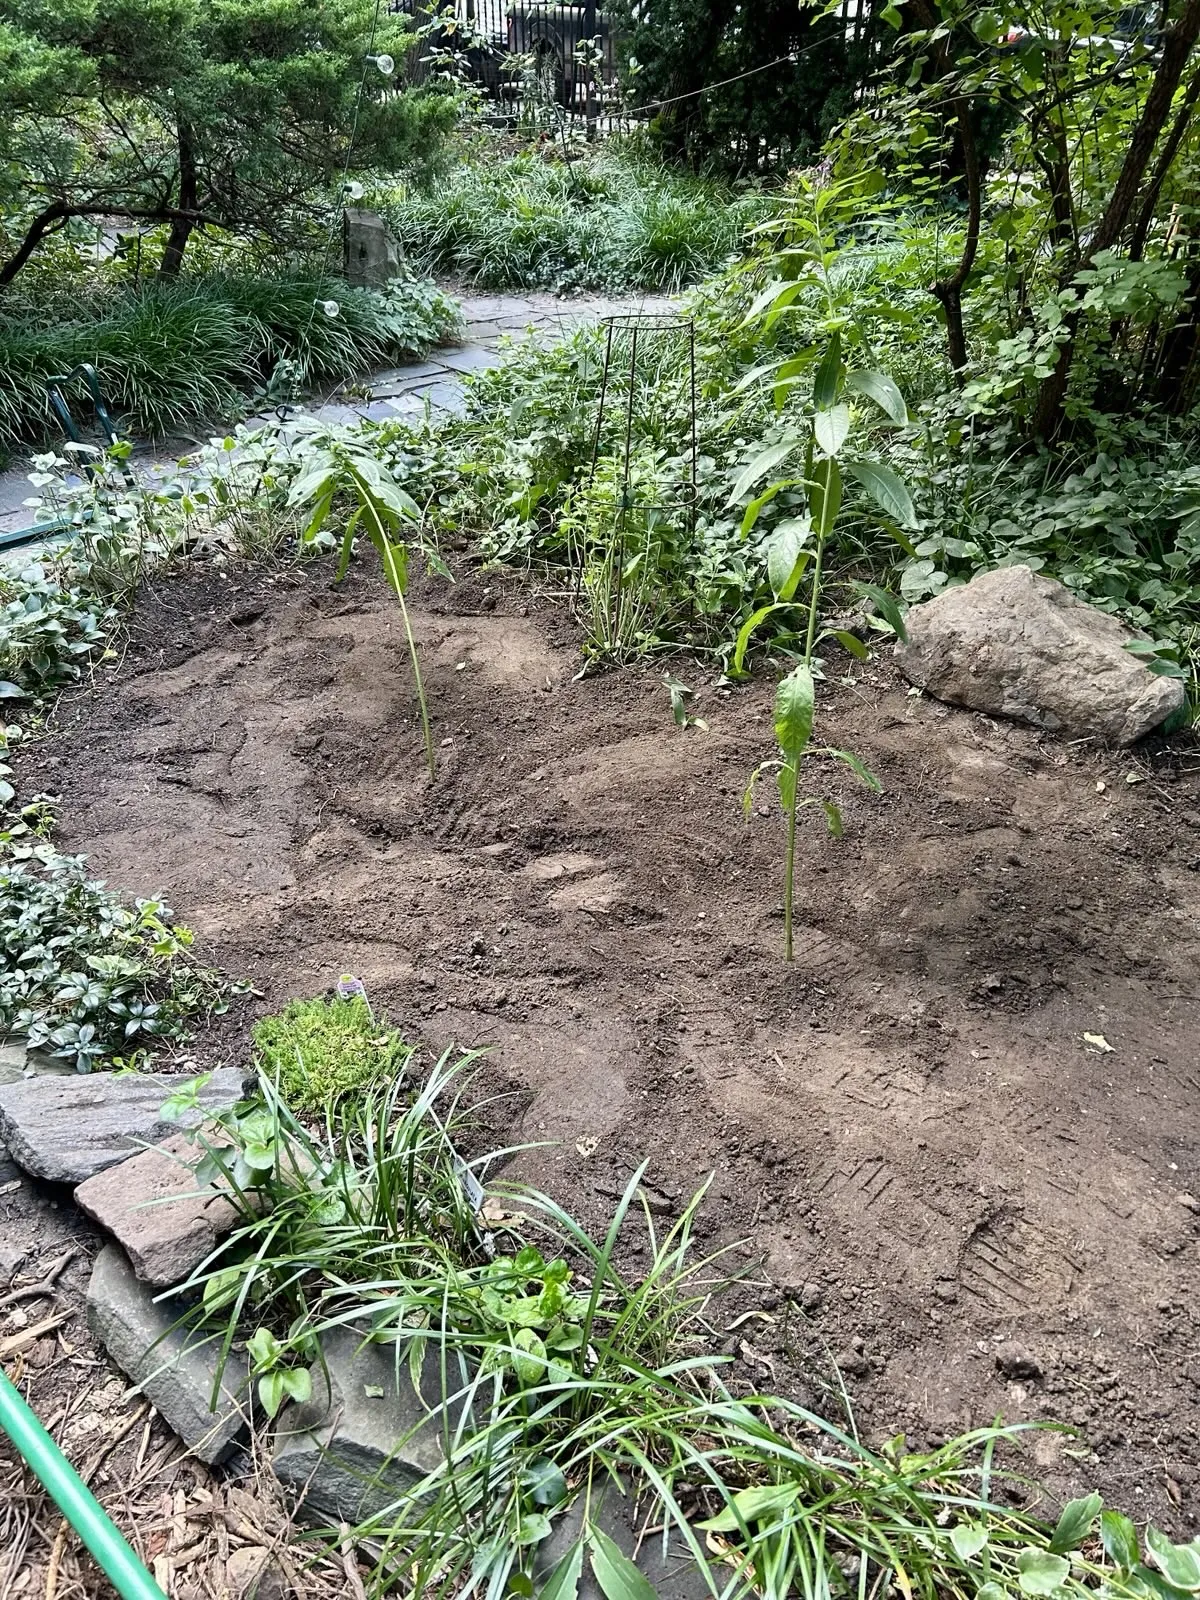
After all of our efforts in the plant selection and site preparation phases, installation was relatively straightforward. The important thing is to loosen the roots of the saplings and plant at the same height they were at in the container in order to avoid excessively burying or exposing the plant crown. Next time, we will try using an auger drill attachment, but it wasn't necessary this time for such a small planting.
Post-installation
 One great benefit of planting in the fall is that we don't have to water that much (especially because it is a shady area). We gave the site a very thorough initial watering and again every few days for two weeks. Now, we water as necessary only if the soil is dried out. Hopefully by next year, the plants will be healthy enough to not need watering except in drought conditions.
Our most important task for the next year is regular and thorough weeding, at least every few weeks. Other than that, we can think about higher level concerns. Are the groundcovers filling in nicely, or do they need to be supplemented? Are the flowers providing continuous bloom throughout the year or does the composition need to be amended? In a few years, we can consider whether we need to do a cutback in spring to preserve visual legibility (however, we'll try to leave it alone if possible in order to preserve wildlife habitat). We will be sure to observe our visiting bees, butterflies, birds, and other pollinators and wildlife, as well as create more educational material to share our work and learnings with the community.
Any questions or comments can be emailed to surya at modalduality dot org. If you're ever in the New York area, come visit us at Green Oasis Community Garden in the East Village! We're open weekends and have many exciting events including theatre, concerts, and volunteer workdays.